So another way to attach the sides is tapping and peening. I thought I’d give it a try on a small smoother. I decided on aluminum sides and hot rolled steel for the sole. The aluminum is 1/8” x 2” and hot the rolled steel is about 3/8” x 1 7/8”. I wanted to use a 1 5/8” block plane iron.
Infill is cherry.
Lever cap is brass.
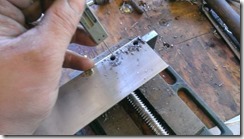
This time I cut the sole in 2 pieces. I found this technique a lot easier. The I drilled the sides. And tapered them with a reamer.
Next I used the counter sink to give the holes a countersink. I figured between the taper and the countersink, they should tighten up nice.
The holes were the tapped 1/4×20
And the bolts tighten in. I really don’t think it would be necessary to use epoxy, but for the price of a tube of JB Weld, everything got welded.
Here I’m checking the depth to make sure I’m deep enough for the bolts.
bolt heads where cut off.
Then the bolts pened over.
I have about 6 hours in it at this point.
And a quick test run
Day 2
About another 4-5 hours.
I didn’t have a piece of metal for the cap iron (I may eventually just get a thicker iron) so I wound up using an old badly pitted #120 iron. It will be replaced.
The rest of the time was spent shaping the lever cap, making the chip breaker and sanding and finishing the plane.
Thanks for looking.
dw
________________ As an Amazon associate, we earn income from qualifying purchases when you click on a link. Your link clicks help us fund our website. ________________


